Saturday, February 12, 2011

Finishing off a Quilt - 1. Borders

This is my log cabin all sewed up from January.  I'm quite happy with it!


So the next job is finishing the quilt by applying the borders.  Borders really bring a quilt to life!  Plus they give it alot more size.  I didn't have the time to choose my own borders with the new baby, so I sent Shane into the local patchwork shop to a salesperson I really trust (who has impeccable taste) with a list, and this is what she sent out!
I love it!
I'm going for finished 2" borders of the blue (so cut 2.5") and 5.5" outer borders.  If you take your finished quilt top into any patchwork shop they will be able to calculate your required meterage for borders.  I also have enough of the floral to do the binding as well.

The first job is cutting the borders.  I didn't iron first - very naughty!!


Depending on how much fabric you have, you can cut with the length, or across the length.  In the case of the inner borders, I only have about 0.5m, so I need to cut my strips across the length.  This means I'll need to join strips to get enough length across the quilt top.  So I'm cutting 6 strips.
  

Once you have sewn length on the strips, you iron them, and lay them across your quilt top - in the middle of the quilt.  This is a really important step as it allows you to square up your quilt top.
A log cabin is fairly easy to square up as there is a lovely line that runs through the middle of the quilt.

Trim the blue border on each side accurately.  I usually do this with a cutting board under the quilt and use a ruler and a rotary cutter.  This time I used scissors....  Not that good really.


Pin on opposite sides of the quilt and sew.

Iron out flat, and follow the same process with the other side.
This really makes a big difference.  The idea is that when you cut the strips at the length of the centre of the quilt, both ends will be the same.  So you can just sew it and cut off the extra - you need this to be square.
Trim, pin and sew.


Once you have completed the inner border, its time to do the outer border, and its just following the same process.
Lay the strips out in the middle of the quilt.
Trim, pin, sew and iron.


Repeat on the other side.
One thing to be very cautious about is whether your print has a direction on it.  If it does (like mine does) try to ensure that you get the print facing all the same way. 


Once you have sewn the outer border on the quilt, you are done!  Now its time to make the batting sandwich and quilt it.


What do you think of my finished product (or at least finished quilt top) ?  Its amazing how the borders will really finish a quilt off.  And once the padding is beneath it, there is a whole new effect to it.
I really like it - its scrappy, but very pretty.   I think Stephanie from Grandmother's Garden did a lovely job in her fabric selection!  The blue is great.
This quilt is going to my midwife to say thanks for giving me a healthy little baby boy.  I'm hoping to have it done by Tuesday when she comes over, but machine quilting is not my forte!  We shall see.

Next post - making the batting sandwich.


Friday, February 4, 2011

February 9 Patch 12" - 3. Coordinated Double 9 Patch

I whipped this up in a very short time on Wednesday, and here it is for you.

I'm really happy with how its turned out - The double 9 patch was lots more fun to sew than the single one.  Maybe give both a go this month?


On another front, I have pieced my scrap log cabin together, and I will be listing a tute for the application of borders, the batting sandwich, and machine quilting.  I hope to have it done over the next week so I can give the final product to my midwife to say thanks :)

Tuesday, February 1, 2011

February 9 Patch 12" - 2. Basic Scrap Block

This is a great block as it can use up any 5" charm squares you might have lying around.
I just happened to have these 4x 4.5" blocks in my stash from another project, and I decided that I would just use them.
I needed a background to tie them all in, and thought I'd be ambitious with a stripe!

So - here are my fabrics:

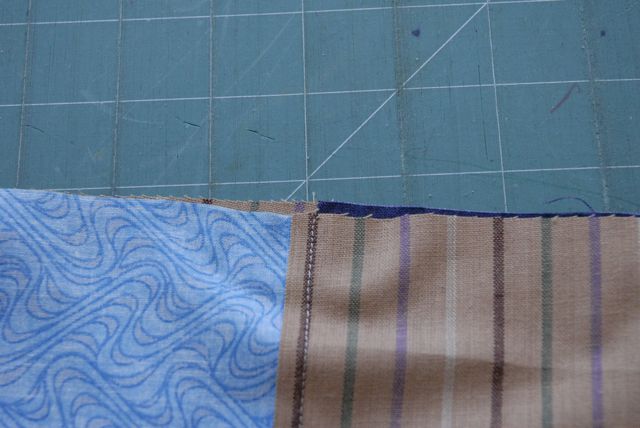
Now the trick with stripes is to cut along the stripe, rather than with the grain.  Because this is a woven stripe (meaning the stripe is part of the fabric body - its not just printed on) its easy to cut once you line your ruler up with the stripe.


Cut your 9 squares, and lay them out:

This way you can tell if the block is going to look OK or not.  This is a verrrrrrry basic block - I'm hoping it will look OK once its in a quilt with sashings and the like.

Next job is pin.  Now you can do multiple pieces at once - it saves getting up and down.  So I pin them as soon as I put the right sides together, that way I know exactly where I need to sew my seams.


Sew up using a 1/4" seam allowance.  Don't sew over your pins like me.... I take my machine's life in my hands every time I do.


When you get to the end of the first piece, put your needle in the down position.  Lift up your foot slightly and put the next piece under - then sew.  This is called chain piecing.  Its used when you are sewing lots of pieces, and saves loads of time!


 I had a lovely image of the pieces all together once sewn, but it didn't download for some reason - but its kinda like a flag bunting.  Snip between each of the pieces, iron to the dark side and return to your layout.


 You can see how all the pieces are coming together now.  This is an easy block to finish off in terms of the order of sewing.  I'm going to sew the left 3 pieces together, and then the right single strip, and then attach the two together.


From here we need to match our points.  Remember how I said to iron to the dark side?  Well if you did, you will have a situation a bit like this.

 You can see that the seams are ironed off to each side, and actually the middle part - or the line where you want to match up will sit snugly up against the other piece.  Kinda like they lock together. 
 You want this, and when you have them firmly locked, pin.  Then pin each end of what you are going to sew, and sew it.  When you get to the seams, make sure that the one on the bottom stays folded in the right way - if you have any movement of this at the needle your points wont match.


The next stage of your block will look like this, and this is the toughest part to get the points matching.

Fold the right sides together, and get the seams locking together.  Work on one at a time.  Pin each of the points, and then work on the  sides.  Its most important to get the points matched, and then if the sizes are different, you need to ease the remainder of the seam.  So you stretch the short pieces and pin in lots of places to ensure that they all match up.

The more accurate your sewing and 1/4", the easier it is to line everything up!  Obviously when you have loads of small pieces all together, the challenge is to make multiple seams correct so the final product is right.


Here's my final block - it really is incredibly simple, and not too challenging for an experienced patchworker, so I've decided to do something a little more tricky.....


This will be the one I seam up and show you tomorrow.  Already cut out, ready to go!


Happy sewing, and remember to leave a comment if you have anything you would like to pass on to me.

February 9 Patch 12" - 1. Details

So here we go for February!
This is another basic block, but its important to get the skills right here.  The purpose of this month is to learn how to match points so that when we move onto triangles and the like, you have a basic understanding of where to go.

I'm using these websites for info:

http://quilting.about.com/od/quiltblock ... lock_2.htm

http://www.quiltingassistant.com/doubleninepatch.html

The fabric requirements are very small, and its easy to cut out.  You just need 4.5" square pieces - 4 of colour A and 5 of colour B, and they go together like a checkerboard.

I'm going to be doing a scrap block and a coordinated block.  The scrap block is a simple 9 patch, whereas the coordinated block will be a double 9 patch.

Because this is so quick to sew, all the instructions will be in the next post, and the only tricks you will learn are chain piecing and matching points (my way...)

As always - there are loads of patchwork experts out there, I'm not one of them, but I am happy to help where I can.  If you have any suggestions for how to make life easier, please leave a comment so that we can all improve our skills!

So - on with the sewing.......

Thursday, January 27, 2011

Introducing.....

Campbell Blair D-W.


He was born at about 1am on the 25th January at home - just as planned.  He was 8lb4oz, and while the labour wasn't super quick, it wasn't slow either.  Just very painful!  Definitely the last one from me.

So far he's doing everything perfectly.

Monday, January 24, 2011

Family

Having another baby makes you think about your own upbringing in so many ways.  With this child being so late (11 days and counting......) it makes me think about my other two - one was induced 11 days late, and the other was on his due date.
Their personalities are very different, the one who was late is very stubborn and determined!!  Rushes headfirst into every situation, makes up stories, manipulates everyone around her.... She's hard work.  But I admire her spirit and her fight.  If we can keep ourselves from killing her, I think she will be a fine young woman who is very successful.
The one who was on time is my little man.  He's a squishy wee thing, and ever so clever.  He's quicker to give up than J, she can be tricked into doing jobs whereas if H isn't interested, he walks away.  He surprises us with his deep thinking, his understanding of how things work, and his patience.

I originally thought this one might be a boy, but now thats its late, I'm thinking its a girl!  And I'm petrified that its going to be another stubborn minx like #1.

So I grew up in a family of 4 kids - and we are all very different!!  This is our most recent photo together from April 2010 - its been a few years since we had one since we have at different times all lived in different countries! But we were all together at my younger brother's wedding.  My brothers are wearing the Robertson tartan - one is a family kilt from my late uncle Adam, and the other was custom made in Edinburgh.


When I think about personalities of my siblings I can summarise, but really we are all too complicated to make wide statements about.
My older brother is sensible.  He's intelligent, and he loves a good laugh.  And a good bottle of wine.  He's a family man and a career man, and I think his biggest challenge is to work the two together.  He feels responsibility heavily, but he is a good friend since he has had the same close group of mates since high school - despite them living around the world.  He misses NZ, which is good since he married a kiwi so I think they will be back to NZ eventually.
My older sister is very talented in a creative way.  She is extremely musical and a deep thinker - she probably over thinks most things truth be told.  She is very protective of her family and her way of life, and I admire her tireless pursuit of contentedness.  She's the sort of person who will be there for you if you ask her to.
My little brother was the unsettled one, but that's changed some over the last few years.  He likes his mates, his concerts and his travelling.  He is an excellent provider, and will work almost anywhere doing almost anything to make sure that the required funds are raised.  Like my older brother, he enjoys a good laugh, and a good drink, and a bloody good time.  When he is on form, he is a blast to be around.  He's married an Aussie girl, so I suspect he is there for good.
I'm the practical one.  I did the boring things (like savings, school, education, work, buying houses etc.....) when I was supposed to, and I guess I'm middle aged before my time.  Getting divorced and having illegitimate kids to a much older divorcee with tatts and a harley threw a bit of a spanner in the works in terms of my reputation, but when they all realised how incredibly sensible Shane is, I think my boring nature was just cemented in stone!

I do wonder what my kids will be like in 30 years time.  I'm pleased I'm having my third child because how nice to have siblings.
(I just wish this baby would come soon!!!!!!!!!)

Saturday, January 22, 2011

January Log Cabin - 6. Layout

OK - so if you are like me, you too have sewn 18 of these blocks in January.  Crazy I know, but when I see a dead horse I like to flog it!


Here are some photos of my scrap 16 blocks.  I have to decide how to put these together now, and what sort of arrangement or effect I'm going for.  These 4 are not your only options - there are many ways you can put them together.
Let me know what you think I should go for.